Asbestos removal is one of those tasks where the details matter. The process is designed to manage risk, prevent fibres from becoming airborne, and confirm a site is safe to reoccupy once work is complete. For property owners, uncertainty often comes from not knowing what “removal” actually includes beyond taking material away.
Looking at examples under Asbestos Removal Perth WA helps illustrate how removal stages are usually described, especially when you are trying to understand the sequence of assessment, containment, removal, disposal, and clearance. While exact steps can vary depending on the material and site conditions, the overall structure is fairly consistent.
Step 1: Initial identification and scope assessment
The process typically begins with establishing what material may contain asbestos and how much of it is present. Many asbestos-containing materials cannot be reliably identified by appearance alone, and assumptions can lead to unsafe handling. An assessment may consider the building age, the location of suspect materials, their condition (intact or deteriorating), and the likelihood they have been disturbed previously.
At this stage, documentation is often created to define the scope of work. This is important because different materials carry different risk profiles, and removal methods are planned accordingly.
Step 2: Planning, permissions, and risk controls
Before work starts, a licensed removal team generally prepares a plan that sets out how exposure will be controlled. This may include how areas will be isolated, how dust will be minimised, what personal protective equipment is used, and how waste will be handled.
Planning also accounts for people and spaces nearby. For example, shared walls, tight access paths, neighbours, and ventilation systems can all affect how containment is designed. Where required, notification or regulatory steps may be part of the planning phase.
Step 3: Site preparation and containment setup
Containment is the core of safe asbestos removal. The goal is to prevent fibres from spreading to other parts of the property or the surrounding environment. Depending on the job, this might involve sealing the work area with barriers, restricting access, using signage, and setting up controlled entry and exit points.
Special attention is usually given to surfaces and openings that could allow dust movement. Floors, vents, doorways, and cracks can all become pathways if not managed properly. Preparation often includes establishing a clean pathway for moving equipment and waste in a way that avoids contamination of “clean” areas.
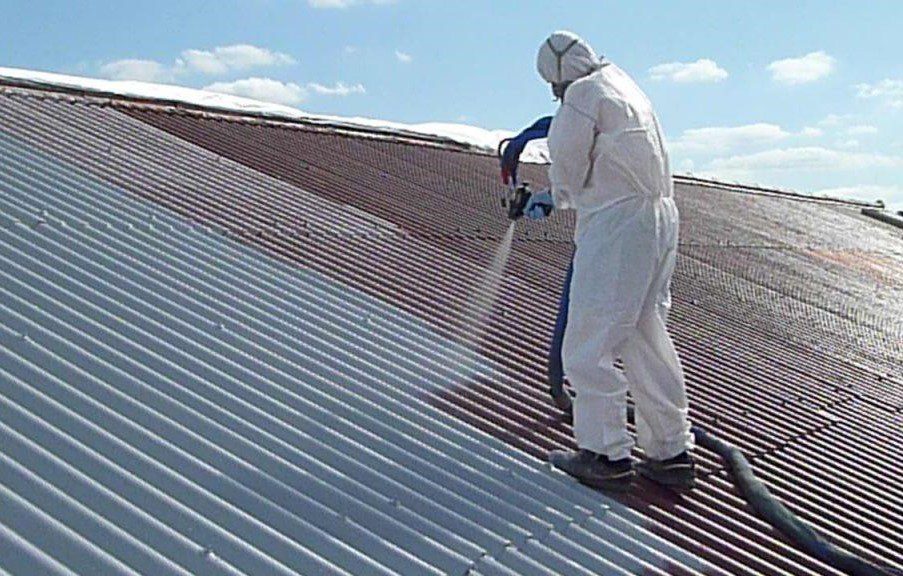
Step 4: Removal using controlled methods
Removal methods are chosen to reduce fibre release. In general terms, controlled removal aims to keep materials stable while they are detached, avoid unnecessary breakage, and limit dust generation. The approach will differ for bonded materials (where asbestos fibres are held in a solid matrix) versus friable materials (where fibres can be released more readily).
The removal phase is also where work pace and technique matter. Rushing can increase breakage and dust. Careful handling, correct tools, and consistent control measures help keep the process predictable and safe.
Step 5: Waste handling, packaging, and transport
Asbestos waste is handled as regulated material. Removed debris is typically sealed and labelled to prevent fibres escaping during storage and transport. Waste handling is not an afterthought. It is part of the risk control system because loose debris or torn packaging can contaminate vehicles, pathways, or disposal areas.
A well-run job maintains separation between clean and contaminated items and includes defined procedures for moving waste out of the contained area.
Step 6: Cleaning and decontamination of the work area
After removal, the work area is cleaned using methods designed to capture fine particles rather than spreading them. This stage can include detailed surface cleaning and careful checks of ledges, corners, and any place dust could settle. Equipment and personnel also need decontamination steps to avoid carrying fibres into clean spaces.
For property owners, this is often the moment the job begins to feel “done,” but the next step is what provides confidence that it is safe to return.
Step 7: Inspection and clearance
A clearance step confirms the removal area meets the required safety standard. This may involve inspection and, depending on the job type, air monitoring or other verification methods. The point is not to create paperwork for its own sake. It is to provide an objective check that containment worked, removal was effective, and the area is ready for reoccupation or follow-on building work.
Clearance is especially important if a renovation will continue after removal, because subsequent trades should not be working in a contaminated space.
Step 8: Reinstatement and next steps for renovations
Once clearance is achieved, homeowners often move to reinstatement, such as replacing sheeting, redoing surfaces, or continuing broader renovations. This is also a good time to review any remaining suspect materials elsewhere in the property, particularly in older homes where asbestos might exist in multiple locations.
The most useful outcome of the process is not only removing a specific hazard, but also reducing uncertainty about what remains and what future work will require.